
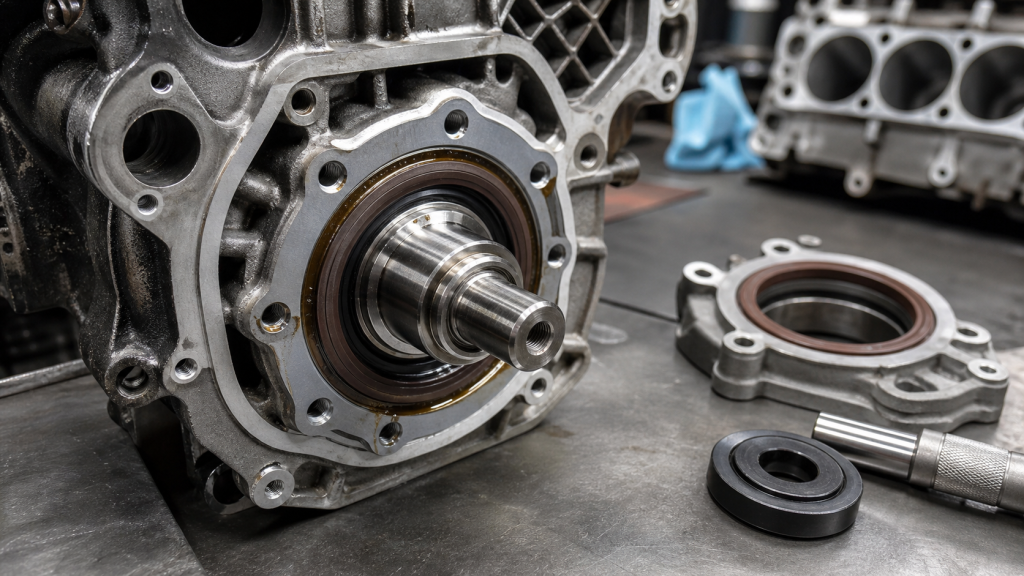
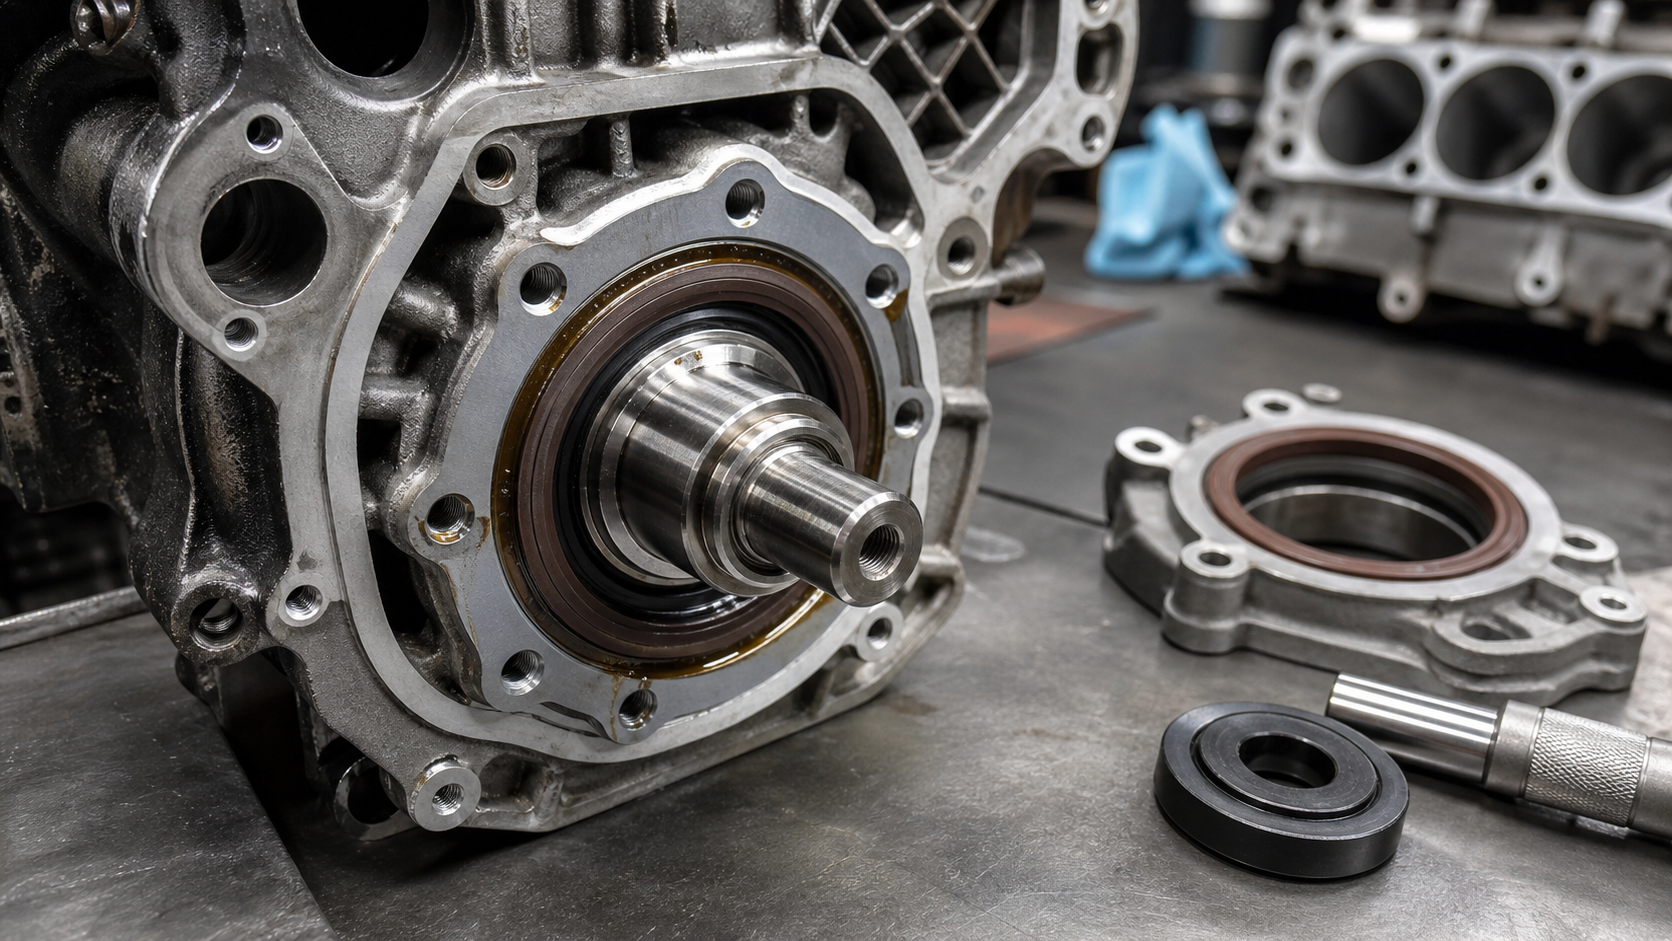
Oil pooling under your vehicle or staining the timing cover area points to a crankshaft oil seal leak. The location of that oil trace tells you which seal is failing—front or rear—before you remove a single bolt. A crankshaft oil seal is a rotary shaft seal that keeps engine oil inside the crankcase while the crankshaft spins. The seal consists of a rubber or PTFE lip held against the crankshaft journal by a garter spring, all encased in a metal housing that press-fits into the engine block or timing cover. Leaks develop when the seal lip wears, the crankshaft surface grooves or corrodes, excessive crankcase pressure forces oil past the seal, or installation errors damage the new seal. Effective diagnosis treats the seal, crankshaft running surface, housing alignment, and crankcase ventilation as one sealing system.
Key Takeaways
- Oil location separates front seal leaks (near the timing cover and pulley) from rear main seal leaks (between the engine and transmission bell housing).
- Crankshaft surface damage—grooves, rust, or roughness on the seal journal—causes repeat leaks even after seal replacement.
- Excessive crankcase pressure from a clogged PCV valve or worn piston rings pushes oil past any seal.
- Repair sleeves restore worn crankshaft seal journals without replacing the entire crankshaft, providing a new press-fit surface for the seal lip.
- Proper seal installation requires a seal driver tool, light oil on the seal lip, and verified housing alignment to prevent immediate damage.
Diagnose Front vs. Rear Crankshaft Seal Leaks by Oil Location
Front Crankshaft Seal: Oil Trace Near the Timing Cover
The front crankshaft seal sits at the front of the engine, where the crankshaft protrudes through the timing cover to drive the accessory belts. Oil from a failed front seal drips onto the harmonic balancer, crankshaft pulley, and serpentine or V-belt. You will see oil streaks radiating outward from the pulley hub as centrifugal force flings the oil onto nearby components. Fresh oil accumulates on the underside of the engine near the front, and the timing cover area shows a greasy buildup. Belt contamination is common: oil-soaked belts slip, squeal, and wear prematurely. The front seal is accessible after removing the drive belts, crankshaft pulley bolt, and harmonic balancer, making replacement less labor-intensive than rear seal work.
Rear Main Seal: Oil Between the Engine and Transmission
The rear main seal seals the crankshaft where it exits the back of the engine block and enters the transmission bell housing or flywheel housing. A leaking rear seal deposits oil in the space between the engine and transmission. You will find oil streaks on the flywheel, clutch housing (manual transmission), or torque converter housing (automatic transmission). Oil drips from the bottom rear of the engine, often pooling on the transmission pan or bellhousing seam. Because the rear seal is behind the flywheel or flexplate, replacement requires transmission removal, clutch inspection (manual), and flywheel bolt torque verification. The rear crankshaft journal is exposed to pressurized oil from the engine’s main oil gallery, which increases the likelihood of leaks if crankcase pressure is elevated or the seal lip is worn.
Table: Front Seal vs. Rear Seal Comparison
Feature | Front Crankshaft Seal | Rear Main Seal |
|---|---|---|
Location | Timing cover, front of engine | Between engine block and transmission |
Oil trace | Pulley, belts, front underside | Flywheel, bell housing, rear underside |
Access | Remove belts, pulley, harmonic balancer | Remove transmission, flywheel/flexplate |
Typical labor complexity | Lower (front access) | Higher (requires transmission removal) |
Oil pressure exposure | Atmospheric (crankcase pressure only) | Main oil gallery pressure plus crankcase |
Common secondary damage | Belt slip, pulley wear | Clutch contamination (manual), converter seal leak (automatic) |
Identify Root Causes Beyond Seal Wear
Excessive Crankcase Pressure and PCV System Blockage
Crankcase pressure builds when combustion gases blow past worn piston rings or the PCV (positive crankcase ventilation) valve becomes clogged. Normal engine operation produces some blowby, which the PCV system vents into the intake manifold. A blocked PCV valve, collapsed hose, or clogged breather restricts this venting, trapping pressure inside the crankcase. That pressure pushes oil past even a new seal lip. Symptoms include oil seeping from multiple gaskets simultaneously, valve cover leaks, dipstick popping out, and oil mist in the air filter housing. Before replacing any crankshaft seal, remove and shake the PCV valve: it should rattle freely. Inspect the PCV hose for kinks or internal collapse. On high-mileage engines with worn rings, excessive blowby may require cylinder pressure testing and compression checks to confirm ring condition.
Crankshaft Surface Damage: Grooves, Rust, and Roughness
The seal lip rides on a narrow band of the crankshaft called the seal journal or running surface. Even a shallow groove, rust pitting, or rough spot on this journal allows oil to leak past the seal. Grooves form when the old seal lip wears into the shaft over time, or when debris (dirt, abrasive particles) is trapped between the seal and the shaft. Rust develops on the journal if the engine sits unused or moisture enters during storage. Surface roughness results from improper seal removal: prying out the old seal with a screwdriver can gouge the crankshaft. A new seal installed on a damaged journal will leak immediately. The seal lip cannot conform to significant surface irregularities. Inspect the seal journal visually and by feel (run a fingernail across the surface) after removing the old seal. A repair sleeve is the correct fix when the journal is grooved or corroded.
Housing Misalignment and Seal Installation Errors
The seal bore in the timing cover or engine block must be concentric with the crankshaft centerline. Misalignment occurs when the housing is cracked, warped, or the mounting bolt holes are distorted from overtightening. A misaligned bore cocks the seal at an angle, forcing one side of the lip against the shaft harder than the other and creating an uneven wear pattern. Installation errors are equally destructive. Driving the seal in crooked, using a hammer and socket instead of a proper seal driver, or failing to lubricate the seal lip causes immediate damage. A dry seal lip tears during initial startup. Over-driving the seal into the bore crushes the rubber and distorts the garter spring. Under-driving leaves the seal proud of the housing face, where it can be knocked loose by pulley installation. Inspect the housing face for cracks and verify bore condition before installing the new seal.
Inspect the Crankshaft Seal Running Surface
What to Look For: Grooves, Corrosion, and Runout
After removing the old seal, clean the crankshaft journal with a lint-free cloth and solvent. Inspect the seal running surface under good lighting. A groove from the old seal appears as a narrow, polished band or depression that you can feel with a fingernail. Corrosion shows as rust pitting, dark discoloration, or rough patches. Any visible groove or significant pitting will compromise the new seal. Check for shaft runout by mounting a dial indicator on the housing and rotating the crankshaft by hand. Excessive runout indicates a bent crankshaft or worn main bearings, and the seal will not seat evenly.
Measurement Tools and Tolerance Limits
Use a dial indicator with a magnetic base to measure runout. Position the indicator tip perpendicular to the seal journal, zero the gauge, and rotate the crankshaft through 360 degrees. Record the total indicated runout (TIR). For surface roughness, a profilometer or comparator plate provides quantitative data, but visual and tactile inspection catches most damage. Measure the journal diameter with a micrometer at multiple points around the circumference and along the axial length. Compare all readings to the engine manufacturer’s specification for diameter tolerance, runout limits, out-of-round, taper, and surface finish. These values vary by crankshaft design and seal type, so consult the engine service manual or approved engineering drawing for your specific application.
Checklist: Crankshaft Seal Journal Inspection
- Clean the seal journal with solvent and a lint-free cloth; remove all old seal material and debris.
- Inspect visually for grooves, rust pitting, scoring, or discoloration under adequate lighting.
- Run a fingernail across the journal surface in the circumferential direction to feel for grooves or steps.
- Measure journal diameter at four points (90-degree intervals) and at three axial positions using a micrometer.
- Check runout with a dial indicator; rotate crankshaft 360 degrees and record TIR.
- Compare measurements to engine manufacturer’s specification for diameter tolerance, runout limit, and surface finish.
- Document findings; any condition exceeding manufacturer limits requires repair-sleeve installation or crankshaft replacement.
Repair-Sleeve Restoration vs. Crankshaft Replacement
How a Repair Sleeve Provides a New Seal Surface
A crankshaft repair sleeve is a thin-wall steel sleeve that press-fits over the damaged seal journal to restore a smooth, concentric running surface for the seal lip. The sleeve is precision-machined to tight tolerances for diameter and surface finish. Installation involves cleaning the worn journal, applying a thin layer of anaerobic adhesive (such as Loctite 620 or equivalent), and pressing or driving the sleeve into position using a sleeve installation tool. The sleeve outer diameter becomes the new seal journal. The seal installs against the sleeve exactly as it would against the original crankshaft surface. Repair sleeves are available for both front and rear crankshaft seals, with sizes matched to common engine families. This method avoids the cost and downtime of crankshaft replacement while providing a reliable, long-term seal surface.
When to Use a Repair Sleeve
A repair sleeve is appropriate when the crankshaft journal is grooved, corroded, or worn but the rest of the crankshaft is serviceable. Use a repair sleeve if:
- The seal journal has a visible groove that cannot be polished out.
- Rust or pitting covers a significant portion of the seal contact area.
- The journal surface finish is degraded beyond manufacturer specification.
- The crankshaft is otherwise in good condition (no cracks, no excessive main bearing wear, acceptable runout at other journals).
- Replacement crankshaft cost or lead time is prohibitive.
Do not use a repair sleeve if the crankshaft is bent (excessive runout), cracked, or has worn main bearing journals that require regrinding. In those cases, crankshaft replacement or repair is necessary. A repair sleeve increases the journal diameter slightly, so verify that the seal bore and any adjacent components (pulley hub bore, flywheel pilot bearing) have adequate clearance before proceeding.
Installation Considerations
Sleeve installation requires the crankshaft to be accessible, either in the engine (front seal) or removed (rear seal, depending on access). Clean the damaged journal with fine abrasive cloth to remove corrosion and provide a mechanical key for the adhesive. Wipe the surface with acetone or brake cleaner to remove oil residue. Apply a thin, even coat of high-strength anaerobic adhesive to the journal. Position the sleeve squarely on the journal and press it into place with a sleeve driver or socket that contacts the inner face of the sleeve, not the outer seal surface. Drive the sleeve until it seats against the shoulder or reaches the specified depth. Allow the adhesive to cure per the manufacturer’s instructions (typically 24 hours for full strength) before installing the seal. Check the sleeve outer diameter and runout after installation; if runout exceeds the manufacturer’s limit, the sleeve was driven crooked and must be removed and reinstalled.
Crankshaft Seal Replacement Procedure
Remove the Old Seal Without Damaging the Housing
Seal removal without a puller risks gouging the crankshaft or cracking the housing. For front seals, drill two small pilot holes in the seal face, opposite each other, and thread in two self-tapping screws. Use locking pliers or a slide hammer attached to the screws to pull the seal straight out. Alternatively, use a seal puller with hooked arms that grab the seal inner edge. For rear seals in aluminum housings, a pry bar wrapped in a shop rag provides leverage without marring the housing, but apply force evenly on both sides to prevent cocking the seal. Never pry against the crankshaft journal itself. If the seal is stuck, apply penetrating oil around the outer edge and let it soak before attempting removal. Some rear seals are split two-piece designs that slide into grooves in the block and cap; these require different removal and installation techniques, so consult the engine service manual.
Clean and Prepare the Seal Bore and Shaft Surface
After seal removal, clean the seal bore in the housing with a lint-free cloth and solvent. Inspect the bore for cracks, distortion, or corrosion. Verify the bore is concentric with the crankshaft within manufacturer specification. Minor surface rust or residue in the bore can be removed with fine abrasive cloth. Clean the crankshaft seal journal as described in the inspection section. If the journal passes inspection (no grooves, acceptable runout, correct diameter), wipe it with a clean cloth dampened with engine oil. If a repair sleeve is installed, ensure the adhesive is fully cured and the sleeve surface is clean and dry before proceeding. Check that the seal bore and journal are free of debris, old gasket material, or metal shavings.
Install the New Seal with Proper Tools and Lubrication
Apply a thin coat of clean engine oil to the seal lip and the crankshaft journal. This lubrication is critical: a dry seal lip will tear during initial rotation. Position the new seal at the bore opening with the lip facing inward (toward the engine oil). Use a seal driver tool that matches the seal outer diameter and contacts the seal outer face evenly. A large socket or piece of pipe may substitute if its diameter matches the seal outer edge and it does not contact the seal lip or inner edge. Tap the driver with a soft mallet, working around the seal in a circular pattern to keep it square to the bore. Drive the seal until it is flush with the housing face or reaches the depth specified in the service manual (some seals must sit slightly recessed). Do not over-drive the seal; excessive force crushes the rubber and distorts the metal casing. Verify the seal is seated evenly by measuring the depth at multiple points around the circumference. Install the crankshaft pulley or flywheel carefully to avoid catching the seal lip. Torque all fasteners to specification.
Checklist: Seal Installation Best Practices
- Verify the replacement seal is the correct part number for the engine model and year.
- Apply clean engine oil to the seal lip and crankshaft journal before installation.
- Use a seal driver tool that contacts the outer face of the seal, not the lip or inner edge.
- Keep the seal square to the bore; tap around the circumference in small increments rather than driving one side fully first.
- Stop when the seal is flush with the housing face or at the specified depth; measure at multiple points to confirm even seating.
- Do not reuse old seals; the lip set and garter spring tension are lost after removal.
- Install the pulley or flywheel carefully; align components to avoid dragging across the seal lip.
Prevent Future Crankshaft Oil Seal Leaks
Service the PCV System and Monitor Crankcase Pressure
Replace the PCV valve at the interval specified by the engine manufacturer. A stuck-closed PCV valve traps pressure; a stuck-open valve allows unmetered air into the intake and can cause rough idle. Inspect PCV hoses for cracks, collapse, or blockage. Clean or replace the crankcase breather element if the engine uses a filtered breather. On turbocharged engines, check the crankcase vent line routing and any oil-air separator for restrictions. If multiple oil leaks appear simultaneously or oil consumption increases without visible external leaks, perform a cylinder leakdown test to quantify blowby. Excessive leakdown indicates worn rings or cylinder bore damage. Address high blowby before replacing seals; otherwise, the new seal will leak due to pressure.
Maintain Correct Oil Level and Change Intervals
Overfilling the crankcase raises the oil level into the crankshaft counterweights, which whip the oil into foam and increase pressure. Check the oil level on a level surface with the engine off and cooled. Fill to the "full" mark on the dipstick, not above it. Use the oil viscosity and specification recommended by the engine manufacturer. Incorrect viscosity (too thin or too thick) affects seal lip lubrication and can accelerate wear. Change the oil and filter at the specified interval. Degraded oil loses its lubricating properties, and contamination from combustion byproducts can damage the seal lip material. Follow the severe-service interval if the engine operates in dusty conditions, extreme temperatures, or frequent short trips.
Inspect the Crankshaft Surface During Engine Rebuilds
Whenever the engine is disassembled for major service—timing belt replacement, main bearing service, or rebuild—inspect both the front and rear seal journals. Measure diameter, runout, and surface finish as described earlier. Polish out minor imperfections with fine crocus cloth and oil. If the journal is grooved or corroded, install a repair sleeve during the rebuild rather than waiting for a leak to develop. Replace seals whenever the crankshaft is removed or the engine is rebuilt, even if the old seals are not leaking. The labor to access the seals is already complete, and the cost of new seals is minimal compared to the risk of a leak after reassembly. Understanding how crankshafts are manufactured helps you appreciate the precision required in seal journal surfaces.
FAQs
Can you drive with a leaking crankshaft oil seal?
You can drive short distances to reach a repair facility, but prolonged operation with a leaking crankshaft seal risks engine damage. Oil loss lowers the oil level, which reduces lubrication to bearings, the camshaft, and the crankshaft itself. If the oil level drops below the pickup screen, the oil pump will draw air, causing catastrophic bearing failure. Monitor the oil level frequently if you must drive with a leak, and add oil as needed to keep the level above the "low" mark. Front seal leaks that contaminate the drive belt also risk belt failure, which can disable the alternator, water pump, or power steering pump. A rear seal leak that saturates the clutch (manual transmission) will cause slipping and require clutch replacement in addition to seal repair. Schedule repair as soon as possible.
How do you know if the front or rear seal is leaking?
Oil location determines which seal is leaking. Crawl under the vehicle with a flashlight and trace the oil path upward from the lowest drip point. If the oil originates from the front of the engine near the crankshaft pulley and timing cover, the front seal is leaking. If the oil is concentrated between the engine and transmission, at the bell housing seam or on the flywheel, the rear seal is leaking. Clean the engine underside with degreaser, run the engine briefly, and then inspect again with the engine off. Fresh oil will appear at the source of the leak. On some engines, valve cover leaks or oil pan gasket leaks can drip onto the crankshaft pulley or bellhousing and mimic a seal leak. Confirm the leak source by cleaning all suspected areas and re-inspecting after a short drive. Fluorescent dye added to the engine oil and viewed with a UV lamp provides definitive leak tracing.
What causes a crankshaft seal to fail prematurely?
Premature seal failure results from installation errors, crankshaft surface damage, excessive crankcase pressure, or seal material incompatibility. Installing the seal dry (without oil on the lip) tears the rubber during initial startup. Driving the seal in crooked or using excessive force damages the garter spring and distorts the lip. A grooved or rough crankshaft journal cuts the seal lip even if the seal itself is new. Blocked PCV systems or worn piston rings generate pressure that forces oil past the seal. Using the wrong seal material for the oil type (for example, nitrile rubber with certain synthetic oils) causes the rubber to swell or harden. Confirm the replacement seal is the correct part number and material specification. Address all root causes—pressure, surface condition, alignment—before installing the new seal.
Is a repair sleeve as reliable as replacing the crankshaft?
A properly installed repair sleeve is as reliable as a new crankshaft seal journal for oil sealing. The sleeve provides a smooth, concentric surface with appropriate finish and diameter tolerances. Sleeve failure is rare and typically results from improper installation (inadequate adhesive, crooked installation) rather than the sleeve itself. The adhesive bond withstands crankshaft operating temperatures and rotational forces. However, a repair sleeve does not address other crankshaft issues such as bent journals, cracks, or worn main bearing surfaces. If the crankshaft requires regrinding or replacement for other reasons, a repair sleeve is not appropriate. For a seal journal with isolated surface damage and an otherwise serviceable crankshaft, a repair sleeve offers a cost-effective, permanent solution.
How much does crankshaft seal replacement cost?
Crankshaft seal replacement cost varies widely based on vehicle make, model, engine configuration, labor rates, and whether additional components require service. Front seal replacement is typically less expensive because it requires less disassembly—mainly removal of drive belts, crankshaft pulley, and harmonic balancer. Rear main seal replacement costs significantly more because it requires transmission removal, which involves substantial labor. If the clutch is contaminated on a manual transmission vehicle, clutch replacement adds to the total cost. A repair sleeve increases parts cost modestly but does not significantly increase labor time because the crankshaft is already accessible. Request itemized quotes from multiple repair facilities and verify that the estimate includes new seals, proper installation tools, and crankshaft surface inspection. Repairs that skip surface inspection or use improper installation methods often result in repeat leaks.
Conclusion: Treat the Seal and Crankshaft Surface as One Sealing System
A crankshaft oil seal leak is not always a seal problem. The seal lip, crankshaft running surface, housing alignment, and crankcase pressure must all function correctly to prevent leaks. Diagnose front versus rear seal failure by oil location before disassembly, inspect the seal journal for grooves and corrosion, verify PCV system operation, and use proper seal installation tools and techniques. When the crankshaft surface is damaged, a repair sleeve provides a new seal journal without the cost and downtime of crankshaft replacement. Auge Cranks manufactures forged and cast crankshafts with precision-ground seal journals, and we understand how seal-surface condition affects leak prevention. Measure the seal journal during your next engine service, address crankcase pressure issues, and follow correct installation procedures to eliminate repeat seal failures.